Bathroom Exhaust Fan Venting: The Complete Install Guide
Learn how to vent a bathroom exhaust fan the right way: pick a roof, sidewall, or soffit route, size the duct, and meet the IRC outdoor-termination rule.
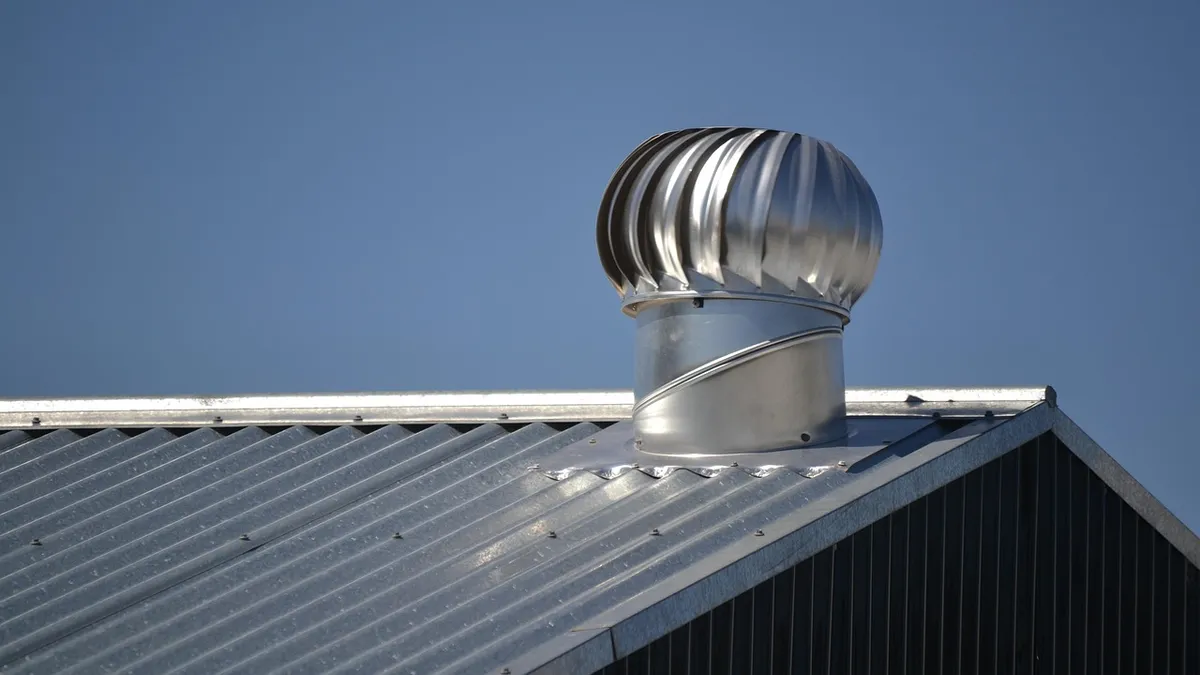
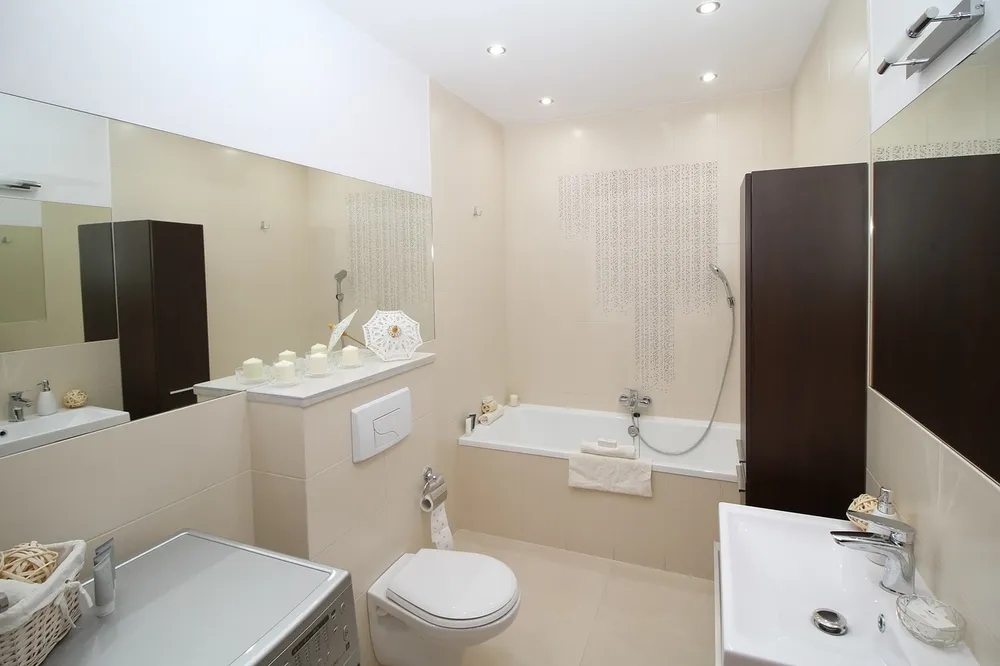
Image: sam_higgins_rulz via Pixabay
Vent a bathroom exhaust fan straight to the outdoors — through the roof, a sidewall, or (as a last resort) a dedicated soffit cap — never into the attic, a soffit vent, or a crawl space. Match the duct size to the fan’s CFM rating, keep the breaker off while you work, and meet the International Residential Code’s exterior-termination rule described below.
Key takeaways
- Never vent into the attic, a soffit vent, or a crawl space. The 2018 International Residential Code (IRC), Section M1507.2, requires bathroom exhaust air to be ducted directly outdoors, not into those spaces.
- Turn the circuit off at the breaker before you touch any wiring, and stop and call a licensed electrician if you find a missing ground, a shared or overloaded circuit, or a tub/shower circuit that isn’t GFCI-protected.
- Three routes work: roof, sidewall, or (only when neither fits) a dedicated soffit cap — never the open soffit vent that feeds the attic.
- Match the duct diameter to the fan’s rated CFM. An undersized duct chokes airflow and makes the fan louder and less effective, even if the fan itself is sized correctly.
- The termination also needs to sit the right distance from windows, doors, and air intakes, with a backdraft damper so outside air can’t blow back in.
Before you touch anything: the safety basics
Switch the fan’s circuit off at the breaker panel before you remove a grille, pull a fan, or touch any wiring, and tag the panel so no one flips it back on while you work. A bath fan manufacturer’s own installation instructions put it plainly: disconnect power at the service panel before servicing or installing the unit, and tag the panel if the breaker can’t be locked.
Call a licensed electrician instead of continuing yourself if you find any of these: no ground wire on the fan circuit, a junction box with more splices than it was built for, a tub or shower circuit that isn’t on GFCI (ground-fault) protection, or any sign of melted insulation or scorching. A new fan installed over a tub or shower must be rated for that location and wired to a GFCI-protected branch circuit — that is a manufacturer installation requirement, not an optional upgrade.
The same caution applies to cutting the opening for new duct: a wall or ceiling can hide wiring or plumbing you can’t see from the room side. If you’re not confident about what’s behind the surface you’re cutting, bring in a licensed contractor.
What does the code actually require?
The rule is short. The 2018 IRC, Section M1507.2, states: “Exhaust air from bathrooms and toilet rooms shall not be recirculated within a residence or to another dwelling unit and shall be exhausted directly to the outdoors. Exhaust air from bathrooms and toilet rooms shall not discharge into an attic, crawl space or other areas inside the building.” In plain English: the duct has to end outside the building envelope, full stop — not in the attic, not in a crawl space, not just loose behind a wall.
A separate section, M1506.2, sets the distance rule for where that exterior opening can sit: at least 3 feet from property lines, 3 feet from any operable or non-operable window or door, and 10 feet from a mechanical air intake — unless the termination sits at least 3 feet above the intake, which satisfies the rule even inside that 10-foot radius.
Two things to keep in mind. First, codes are adopted and sometimes amended locally, and the edition your area enforces may not be the 2018 IRC cited here — confirm the current edition and any local amendments with your building department before you start work (checked against the source below on November 12, 2026). Second, a cap with a working backdraft damper is part of meeting this rule in practice: the damper is what keeps outside air, insects, and cold drafts from coming back in through the duct when the fan isn’t running.
Which route should the duct take: roof, sidewall, or soffit?
Pick the shortest path that gets the air fully outside the building. In order of preference:
- Roof. A roof cap with a backdraft damper, reached by the shortest, straightest duct run you can manage. Fewer bends and a shorter run mean less resistance, so the fan moves more air and runs quieter.
- Sidewall. A wall cap with a backdraft damper, used when the bathroom sits on an exterior wall and a roof run isn’t practical. Keep the 3-foot and 10-foot distances from section above in mind when you pick the spot.
- Soffit, as a last resort only. Some jurisdictions allow a dedicated exhaust cap mounted to the soffit, fed by a short run of rigid duct and fitted with its own backdraft damper — that is different from simply blowing the duct into the open soffit cavity that feeds the attic, which is not allowed under M1507.2. If roof and sidewall truly aren’t options, confirm with your local building department before using this route.
Whatever route you pick, the duct itself still has to reach the outdoors through a capped termination — a bare duct end tucked behind a soffit panel or left loose in the attic does not satisfy the code, even if the duct is pointed roughly toward the outside.
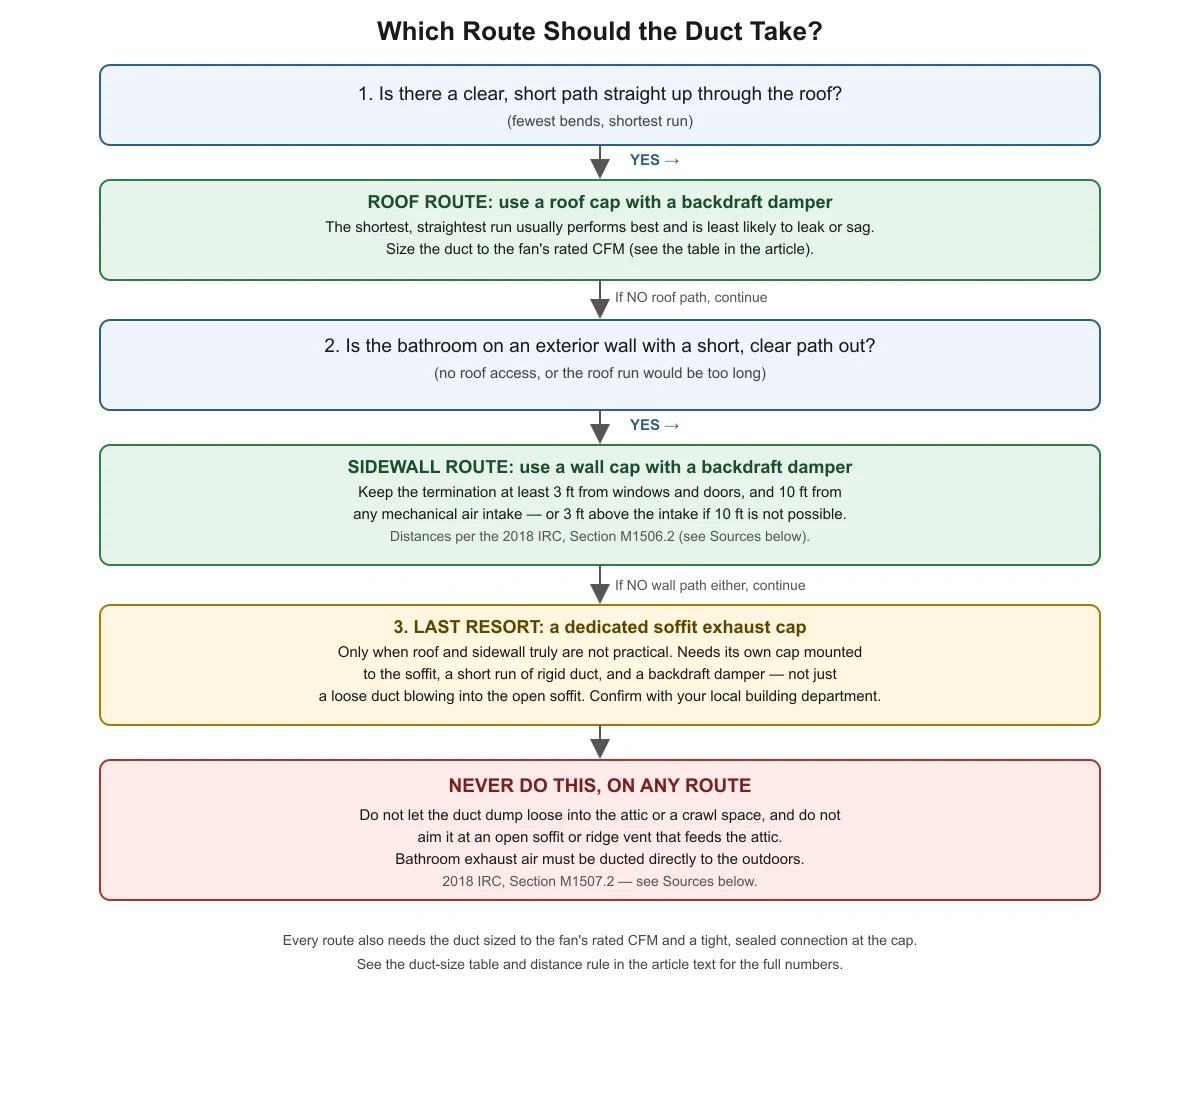
Route decision at a glance
The flowchart above in table form, with the same decisions and distances:
| Route | When to use it | Hardware needed | Key requirement |
|---|---|---|---|
| Roof | Clear, short path straight up through the roof | Roof cap with backdraft damper | Shortest, straightest run; size duct to fan CFM |
| Sidewall | Bathroom on an exterior wall, no practical roof path | Wall cap with backdraft damper | 3 ft from windows/doors; 10 ft from air intakes (or 3 ft above) |
| Soffit (last resort) | Roof and sidewall are both impractical | Dedicated soffit exhaust cap, rigid duct, backdraft damper | Confirm with local building department first |
| Never | Any situation | — | No open attic, crawl space, or open soffit/ridge vent discharge (IRC M1507.2) |
What size duct do you need for your fan’s CFM?
Start with how much air the bathroom needs to move, then size the duct so it doesn’t choke that airflow. The Home Ventilating Institute (HVI), a trade association that publishes third-party-tested fan ratings, recommends a minimum of 50 CFM for a bathroom under 50 square feet, and 1 CFM per square foot of floor space for bathrooms between 50 and 100 square feet. For larger or multi-fixture bathrooms, HVI’s method adds CFM per fixture: 50 CFM each for a toilet, shower, or standard bathtub, and 100 CFM for a jetted tub.
Duct diameter has to keep up with whatever CFM that math produces. A widely installed residential fan line’s own installation manual is a useful reference point: its 50/80/110 CFM models ship with a 4-inch duct adapter but the manufacturer recommends stepping up to 6-inch duct for better performance, while its 110/130/150 CFM model supports 6-inch duct only, with no 4-inch option. Smaller fans can often run on 4-inch duct; fans at the upper end of typical residential CFM ratings need 6-inch duct to avoid throttling the airflow.
| Bathroom scenario | Minimum CFM (HVI) | Typical duct size* |
|---|---|---|
| Small bath, under 50 sq ft | 50 CFM | 4 inch |
| 50–100 sq ft bath | 1 CFM per sq ft (e.g., 80 sq ft = 80 CFM) | 4 inch, confirm against fan’s rated max for 4 inch |
| Add per fixture: toilet, shower, or standard tub | +50 CFM each | Recalculate total, then re-check duct size |
| Add per fixture: jetted tub | +100 CFM | Usually pushes total into 6-inch range |
| Large or multi-fixture bath, 110–150 CFM total | 110–150 CFM | 6 inch (some models have no 4-inch option at this range) |
*Duct size always depends on the specific fan model — check its installation manual before buying duct. The ranges above combine HVI’s published CFM targets with the duct options documented in one manufacturer’s installation manual (see Sources).
For the full worked CFM math by exact room size and fixture count, see what size bathroom exhaust fan you need.
Why can’t you just vent into the attic?
Because the moisture has to go somewhere, and an attic is a bad place for it. Bathroom exhaust air carries a lot of water vapor; the same manufacturer’s installation guidance that covers duct routing calls for insulating the duct and sealing every joint, specifically to control condensation inside a code-compliant exterior run. Dump that humid air loose into an attic instead, and it has nowhere to escape: it condenses on the cold roof deck, soaks into insulation, and over time can lead to wood rot and mold on framing and sheathing.
If you’ve found an existing fan that already vents into the attic instead of outside, see can you vent a bathroom fan into the attic for the code answer and what to check for existing moisture damage before you reroute it.

Step by step: venting a new bathroom fan the right way
- Turn off the breaker for the fan circuit and confirm it’s dead before touching any wiring.
- Pick the route using the flowchart above: roof first, then sidewall, then soffit only as a last resort.
- Size the duct to the fan’s rated CFM using its own installation manual, not a generic rule — see the table above.
- Run the shortest, straightest duct path you can. Support flexible duct so it doesn’t sag, and avoid tight or repeated bends that add resistance.
- Seal every joint with mastic or foil tape rated for duct use, not standard cloth duct tape, which dries out and fails over time.
- Install the exterior cap with its backdraft damper, at least 3 feet from windows, doors, and property lines, and 10 feet from any air intake (or 3 feet above it).
- Insulate the duct where it runs through unconditioned space, to cut down on condensation inside the duct.
- Restore power, test the fan, and confirm the damper opens and closes freely before you close up the ceiling or wall.
- If the fan sits over a tub or shower, confirm the circuit is GFCI-protected before you energize it — that is an installation requirement for fans rated for that location, not optional.
Which bathroom fan problem matches your situation?
This guide covers getting the vent routed and installed correctly from the start. If you’re dealing with an existing fan instead, these cover the most common follow-up problems:
- Not sure what size fan you actually need: What size bathroom exhaust fan do you need? CFM chart
- Existing fan vents into the attic: Can you vent a bathroom fan into the attic? (code answer)
- Fan runs but doesn’t seem to pull air: Bathroom exhaust fan not pulling air? Here’s why
- Fan hums but the blades won’t turn: Bathroom fan humming but not spinning? What to check
- Fan rattles or buzzes: Bathroom fan rattling or buzzing? Noise-to-fix guide
- Fan smells like it’s burning: Bathroom fan smells like it’s burning? Do this first
- Not sure how long to run it after a shower: How long to run a bathroom fan after a shower
- Deciding between a timer switch and a humidity sensor: Bathroom fan timer vs. humidity sensor switch
- Replacing an old fan without rewiring: Replace a bathroom exhaust fan without rewiring
Frequently asked questions
Can I vent a bathroom fan into the soffit instead of the roof or a wall?
Only through a dedicated exhaust cap built for that purpose, with its own rigid duct run and backdraft damper — and only after confirming your local building department allows it, since this varies by jurisdiction. Simply aiming the duct into the open soffit area that ventilates the attic is not allowed; that humid air can be pulled right back into the attic through the same soffit vents meant to bring in fresh air.
Do I need a permit to reroute a bathroom fan duct?
Often yes, especially if the work involves cutting new openings in the roof or an exterior wall. Permit rules are set locally, not by the IRC itself, so check with your building department before you start. If the project also involves adding or moving a dedicated circuit, a permit is even more likely to be required.
Is 4-inch duct ever acceptable for a bathroom fan?
Yes, for fans rated at the lower end of typical residential CFM ranges — check the fan’s own installation manual, since this varies by model. Several widely installed fan lines ship a 4-inch adapter for their lower-CFM settings but recommend or require 6-inch duct once the rated airflow climbs into the 110 CFM-and-up range.
What’s the difference between a backdraft damper and a bug screen?
A backdraft damper is a hinged flap inside the cap that opens when the fan pushes air out and closes on its own when the fan is off, blocking outside air, insects, and cold drafts from coming back through the duct. A bug screen is a separate mesh that only keeps insects from entering the duct opening; it does not stop airflow or drafts the way a damper does, so check that your cap has both.
How do I know if my current bathroom fan setup is already code-compliant?
Trace the duct by sight if you can access the attic: it should run in one continuous, sealed path to a capped termination outside the roof or a wall, not end loose in the attic or dump into the soffit cavity. If you can’t trace it safely yourself, a home inspector or licensed contractor can check it for you, and that same check is required at final inspection when a fan is first installed or replaced.
Sources
- City of Maryville, TN, Code Administration & Inspection Department, 2018 IRC Exhaust Air Information — verbatim text of IRC Sections M1507.2 (bathroom exhaust recirculation and discharge) and M1506.2 (exhaust opening termination distances). Checked November 12, 2026.
- Panasonic Corporation of North America, WhisperGreen Select Installation Instructions — breaker-off and licensed-installer requirements, GFCI requirement for tub/shower locations, duct diameter options by model, and duct-routing guidance.
- Home Ventilating Institute (HVI), Bathroom Exhaust Fans — CFM sizing by room square footage and by fixture count.
bathroomexhaustfanventing.com Editorial Team. Last updated: November 12, 2026.